Stages
Stages are one of the fundamental building blocks in authentik, along with flows and policies.
A stage represents a single verification or logic step within a flow. You can bind one or more stages to a flow to create a customized, flexible login and authentication process.
In the following diagram of the default-authentication-flow, you see multiple stages, or steps, in the authentication process for a user. Policies are bound to some stages; this provides for dynamic application of a specific stage if the policy criteria is met.
Create a Stage
To create a stage, follow these steps:
- Log in as an admin to authentik, and go to the Admin interface.
- In the Admin interface, navigate to Flows and Stages > Stages.
- Click Create, define the stage using the configuration settings, and then click Finish.
After creating the stage, you can then use bindings to determine whether or not the stage will be implemented in the flow.
Stage bindings
A stage binding connects a stage to a flow. The "additional content" (i.e. the content in the stage) is now added to the flow.
You can use a binding to determine which exact stages (all of the steps within a flow) are presented to a user (or a group).
For an overview about all the different types of bindings in authentik and how they are used, refer to About authentik bindings.
Be aware that some stages and flows do not allow user or group bindings, because in certain scenarios (authentication or enrollment), the flow plan doesn't yet know who the user or group is.
Bind a stage to a flow
To bind a stage to a flow (which adds the stage as a "step" in the flow), follow these steps:
- Log in as an admin to authentik, and go to the Admin interface.
- In the Admin interface, navigate to Flows and Stages > Flows.
- In the list of flows, click the name of the flow to which you want to bind one or more stages.
- On the Flow page, click the Stage Bindings tab at the top.
- Here, you can decide if you want to create a new stage and bind it to the flow (Create and bind Stage), or if you want to select an existing stage and bind it to the flow (Bind existing stage).
Control access to a stage
There are several ways use policy bindings to control access to a specific stage of a flow: - Bind a policy to a stage-binding. See our policy documentation. - Bind a user or group to the stage. See steps below.
Bind users and groups to a flow's stage binding
You can use bindings to determine whether or not a stage is presented to a single user or any users within a group. You do this by binding the user or group to a stage binding within a specific flow. For example, if you have a flow that contains a stage that prompts the user for multi-factor authentication, but you only want certain users to see this stage (and fulfill the MFA prompt), then you would bind the appropriate group (or single user) to the stage binding for that flow.
To bind a user or a group to a stage binding for a specific flow, follow these steps:
- Log in as an admin to authentik, and go to the Admin interface.
- In the Admin interface, navigate to Flows and Stages > Flows.
- In the list of flows, click the name of the flow to which you want to bind one or more stages.
- On the Flow page, click the Stage Bindings tab at the top.
- Locate the stage binding to which you want to bind a user or group, and then click the caret (>) to expand the stage binding details.
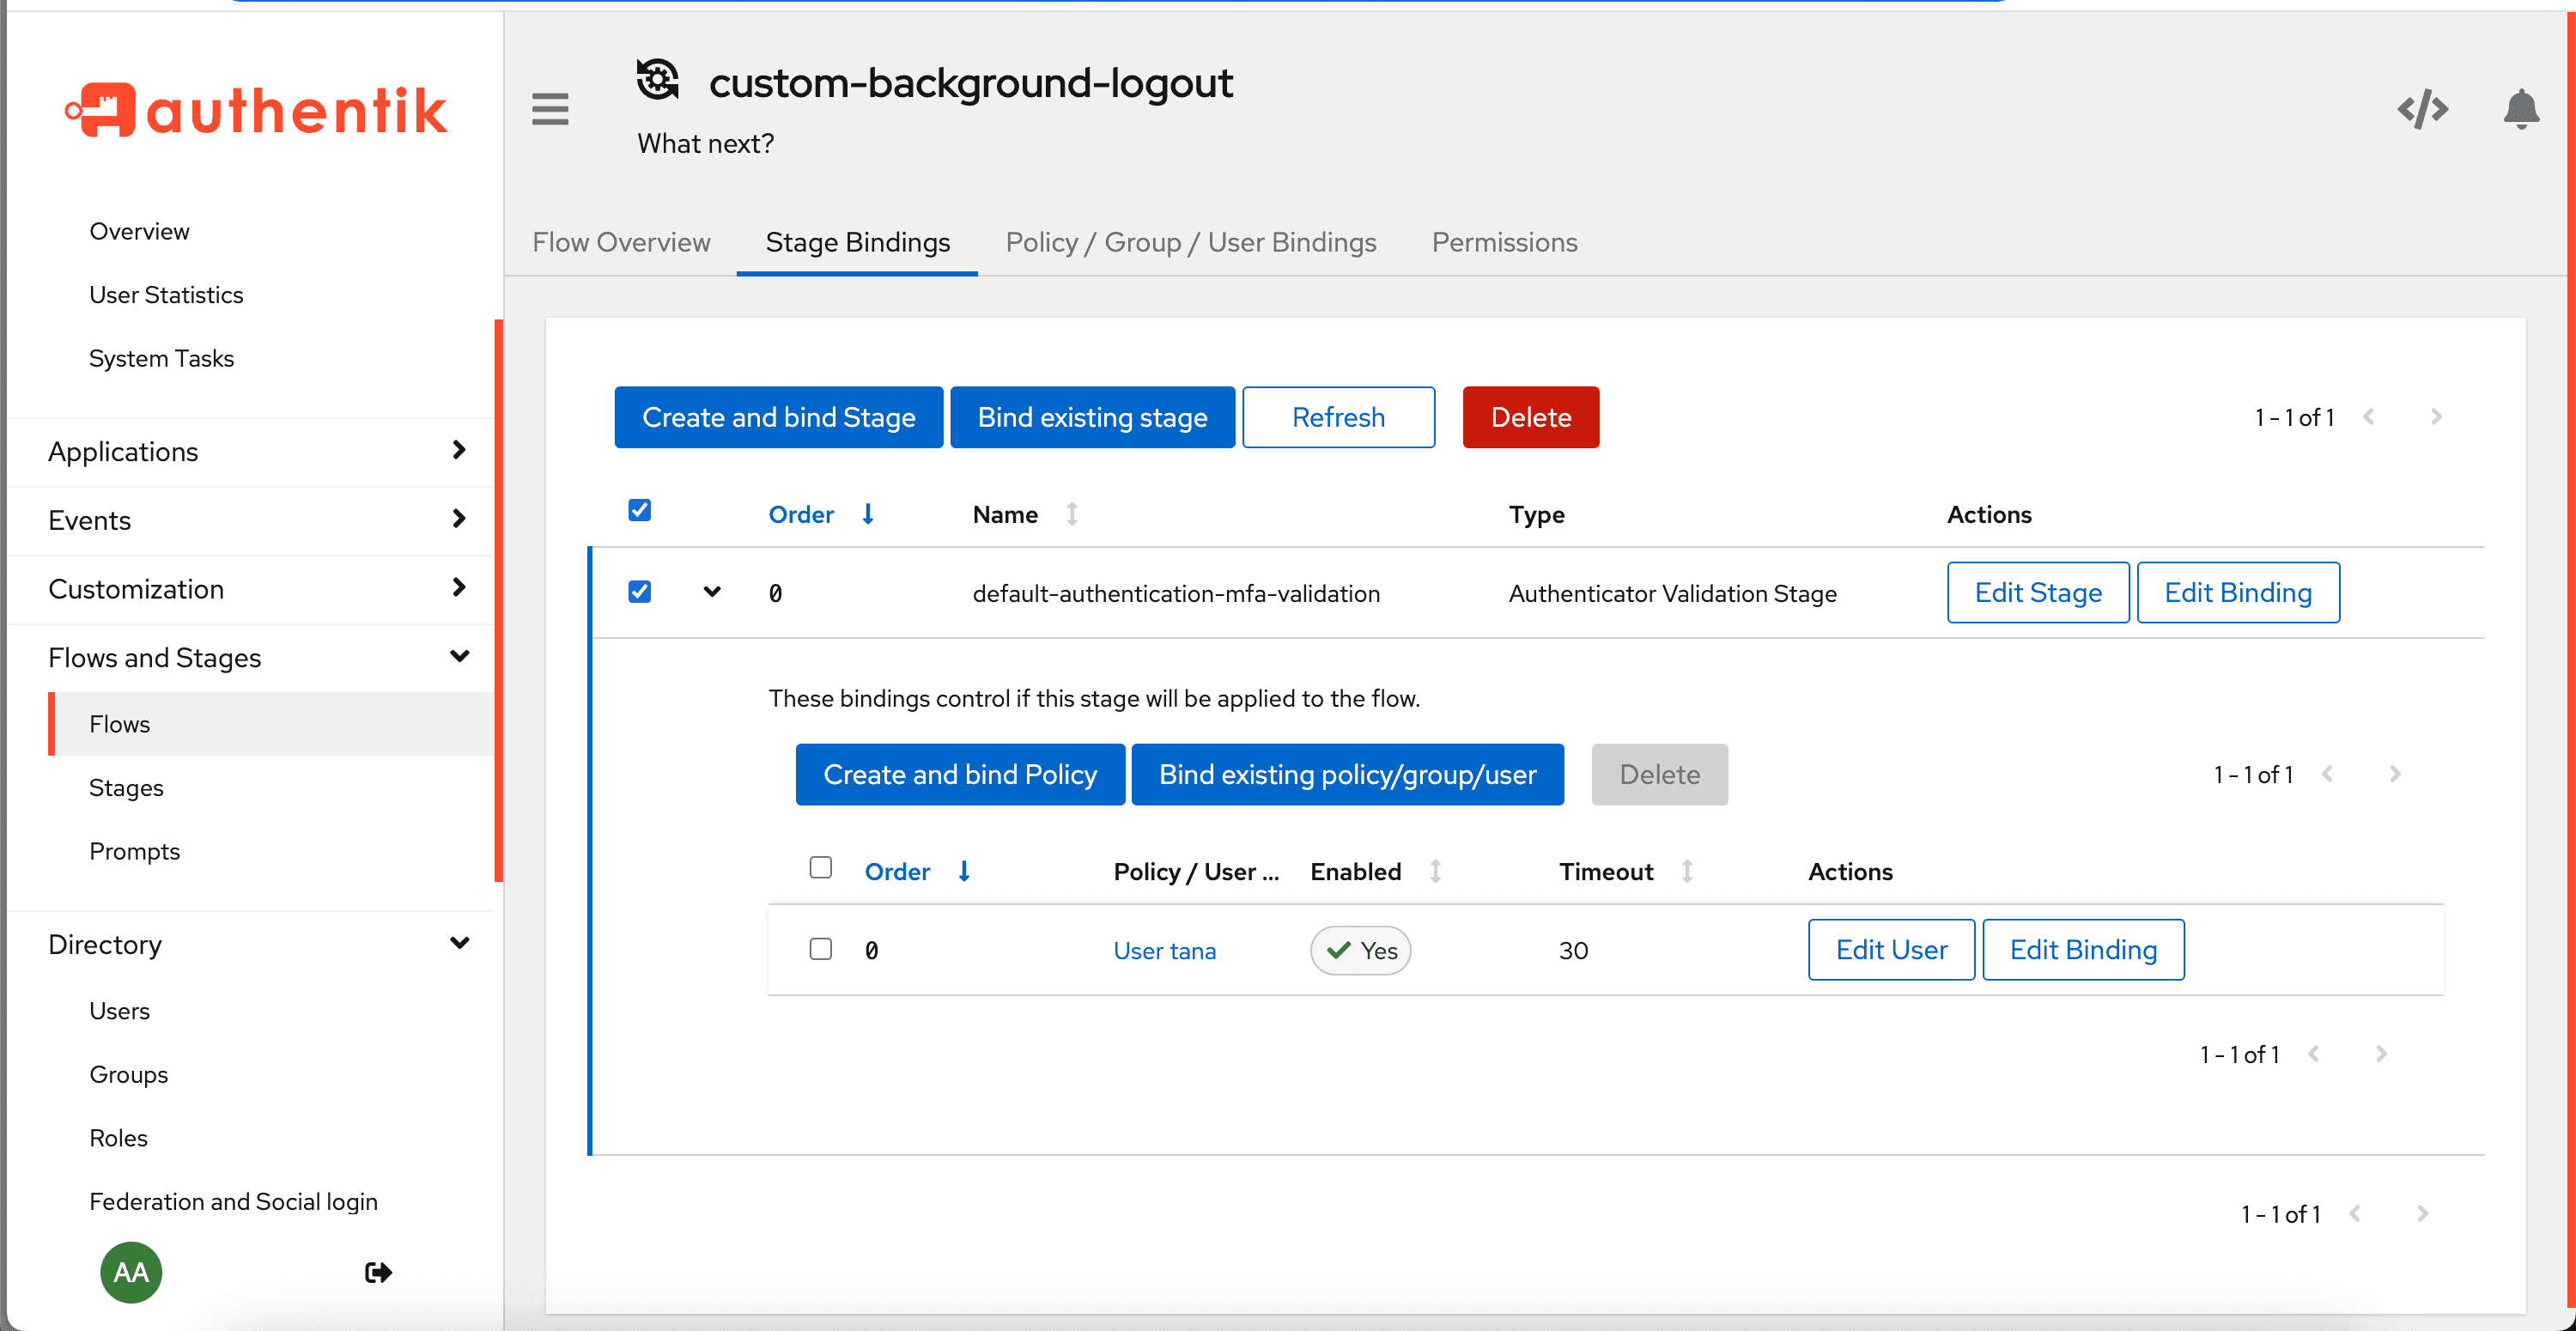
- In the expanded area, click Bind existing policy/group/user.
- In the Create Binding box, select either the tab for Group or User.
- In the drop-down list, select the group or user.
- Optionally, configure additional settings for the binding, and then click Create to create the binding and close the box.
Learn more about the different types of bindings in authentik and working with them.